Friday, December 30, 2011

How to create a RAM Disk

How to create a RAM Drive

Ram Disk is a virtual drive created in RAM. It completely identical with physical hard disks. You can access it through Windows Volume Management or any other disk management software. But it has no moving parts like a Hard Drive. RAM Drive is a volatile memory. That means data on the disk lost immediately after lose the power. You need to allocate a part of a your computers RAM for the RAM Disk. After you have reserve memory for the Ram Disk that memory portion is no longer available to other application programs.
There are large number of third party software to create RAM disks. They support to create large RAM Drives such as 4GB. File system may be FAT,FAT32 or NTFS. Also you can enable NTFS file compression feature.

RAM Disk Performance


Ram disk is faster than hard drive or a Solid State Drives(SSD). So you can access it very fast. This greatly speeds up your computer with reduced access time to files, which in turn, shows a huge improvement in overall performance. You can set your browser's cache folder path on RAM drive to get better performance. It will give you a fast access to the web pages. Also you can set other program's cache folders on that RAM drive. Photoshop,CAD,Compilers, and CD writing software can be configure. Also you can set the Windows TEMP folder on this RAM Disk.

Also you can use this RAM Disk for  high security requirements. Because it does not remain data after you shut down the computer. It prevents access to the sensitive data to a unauthorized party. Also Ram disk will help reduce wear and tear on your real hard drive. That means using a RAM disk will extend your hard disk's life by reducing it from excessive reading and writing. Because most of applications needs to write/read/erase data from your hard disk. Also it saves some amount of power.
Definitely it will be a wise decision that install a RAM Drive on your computer and set application cache folder paths to that RAM Disk.


Steps to configure a RAM disk on your computer.

  1. Go to www.speedguide.net and download Ram disk driver.
  2. Extract the zip file to a folder.

  3. Open Device Manager of your computer.
  4. Right click on the parent node and click on Add legacy hardware.

  5. It will open Add Hardware Wizard for you. To continue, click Next button.

  6. Select Search for and install the hardware automatically(Recommended) radio button and click next button.

  7. Click next button to select the device.

  8. Select Show All Devices from common hardware types list box and Click next button.

  9. Click Have Disk button.(Select the device driver you want to install for this hardware.)

  10. Click Browse button.

  11. Browse the location where is the RAMDisk.inf file located.

  12. Select the RAMDisk.inf file

  13. Click OK button

  14. Click Next button button

  15. If windows informs that windows can't verify the publisher of this driver software,Click on Install this driver software anyway.

  16. Click Finish button to complete the installation process. On this window it inform you that the RAM Disk has been installed on your computer.

  17. Now you have successfully install the RAM disk on your computer. Sometimes it will ask you to restart the computer to take effect. If so, please restart the computer.
  18. Open Device Manager and expand the node RAMDisk. There you can see installed RAM Drive (QSoft).

How to change the Drive letter and the size of a RAM Disk?

  1. Right click on the RAM disk in the Device Manager and Click on Properties. It will open RAM Disk Properties window for you.
  2. Click on Ram Disk Properties Tab

  3. Select a Drive letter from the Drive Letter Drop down box. It displays available Drive letters only. Pick one of them as your drive letter.
  4. You can also change the size of the RAM drive by selecting values from Disk Size drop down box.

How to uninstall a RAM Drive?

  1. Right click on the RAM disk in the Device Manager and Click on uninstall.

  2. Then the system will prompt you to confirm the uninstallation of the selected RAM Disk from your system. Click OK to continue.

  3. Also you can remove the RAM Disk driver software from the system by checking the "Delete the driver software for this device" check box before click OK button.

* After installing RAM Disk or changing its properties, you may need to restart the computer to take effect.
* Never save your important data on a RAM Disk because you will lost all the data after you shut down the machine.

Sunday, December 18, 2011

Open Device Manager in Windows-7

How to open Device Manager in Windows-7

You can configure all hardware on your computer through the device manager. Device Manager provides information about the hardware connected to the your computer.
You can install new hardware, un-install existing hardware or update or roll back device drivers which are installed on your computer using Device Manager. Also you can modify hardware settings and troubleshot problems. Also you can scan your PC for hardware changes.

There are various methods to open Device Manager in Windows-7

Try to open device manage using one of following seven methods.
Method 1
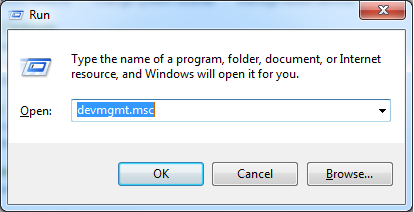
  1. Press Windows Logo key with R button. It will open Run dialog box for you.
  2. Type devmgmt.msc and press enter.
    how-to-open-device-manager-using-run-command

  3. It will open Device Manager for you.
Method 2
  1. Press Windows Logo key with R button. It will open Run dialog box for you.
  2. Type control.exe /name Microsoft.DeviceManager and press enter.
    how-to-open-device-manager-using-run-command-2

  3. It will open Device Manager for you.
Method 3
  1. Click the start button.
  2. Right click on My Computer.
    open-device-manager-from-my-computer-1

  3. Click on manage.
  4. It will open Computer Management window for you
    open-device-manager-from-my-computer-2
  5. Click on Device Manager link in the left pane to open the Device Manager.
Method 4
  1. Open My Computer from start menu or double click on My Computer icon on the desktop.
  2. Right click on the my computer window.
    how-to-open-device-manager-from-my-computer-3

  3. Select Properties menu item and click it.
  4. It will open System Property window for you.
    open-device-manager-from-my-computer-4

  5. Click on the Device Manager Link which is located top-left hand side on the window.
  6. It will open Device Manager Window for you.
Method 5
  1. Click start button.
  2. Type Device Manager in the search box and press enter or you can select it from search results which is appear in the top of the window.
    open-device-manager-through-program-menu

  3. It will open Device Manager for you.
Method 6
  1. Click start button and select Control Panel and click it.
  2. Select Device Manager and click it
    how-to-open-device-manager-using-control-panel-3

  3. It will open Device Manager for you.
Method 7
  1. Open Control Panel.
  2. Click on Hardware and Sound section.
  3. Click on the Device Manager link located on the top right of the window, under the Devices and Printers section.
    how-to-open-device-manager-using-control-panel-2

  4. It will open Device Manager window for you

* You might need to be logged on as an administrator or a member of the Administrators group in order to perform some tasks.
* If you are prompted for an administrator password or confirmation, enter the system administrator's password or provide confirmation to perform the task.

Sunday, December 11, 2011

Clear virtual memory page file in windows-7

How to Clear virtual memory page file in Windows-7

You can configure the system to delete page files when the system is shut down. It prevents direct access to the page file and ensures sensitive information is not available to an unauthorized user.
When the system boots up the operating system determines the allocated page files to open by reading the registry. The page files stores in the HKEY_LOCAL_MACHINE\SYSTEM\CurrentControlSet\Control\Session Manager\Memory Management\PagingFiles and \ExistingPageFiles registry values. It stores the path of the paging file.
You can set the Local Security Policy to clean the page file during system shutdown. By default this policy is disabled that means it does not delete the page files when the system is shut down. When this policy is enabled, the virtual memory page file is cleared during system shutdown. But enabling this policy the system startup and shutdown process take some additional time to complete. That means it slow down the startup and the shutdown process.

How to automatically clear the windows page files when the computer shuts down?

Method 1
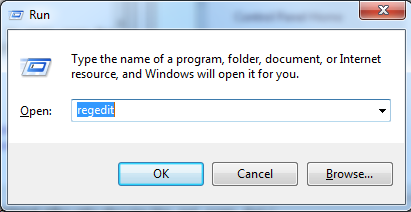
  1. Press Windows Logo button and R key. It will open Run dialog box for you.
    Adjust page file settings in windows 7
  2. Type regedit and press enter.
  3. Navigate to HKEY_LOCAL_MACHINE\SYSTEM\CurrentControlSet\Control\Session Manager\Memory Management and right click on ClearPageFileAtShutdown.
    clear-page-file-at-shutdown
  4. Change the value data to 1 (base=hexadecimal) and click OK.
    clear-page-file-edit-registry-value
  5. Restart the computer to take the effect.
Method 2
  1. Press Windows Logo button and R key. It will open Run dialog box for you.
    windows7-advanced-system-properties
  2. Type SystemPropertiesAdvanced and press OK.
  3. Click on Advanced Tab.
  4. Under the performance section, click on Settings button. It will open performance Options dialog box for you.
    adjust-system-properties-virtaul-memory
  5. Under the Virtual memory Section click on Change button. It will open Virtual Memory settings dialog box for you.
    virtual-memory-performance-options
  6. Un tick Automatically manage paging file size for all drives check box.
    virtaul-memory-settings
  7. Check the No paging file radio button and click on Set.
Method 3
  1. Click start menu button and click the control panel
  2. Double click on Administrative Tools
  3. Double click on Local Security Policy
    edit-local-security-policy
  4. Expand the node and click on Security Options.
    local-security-settings-options
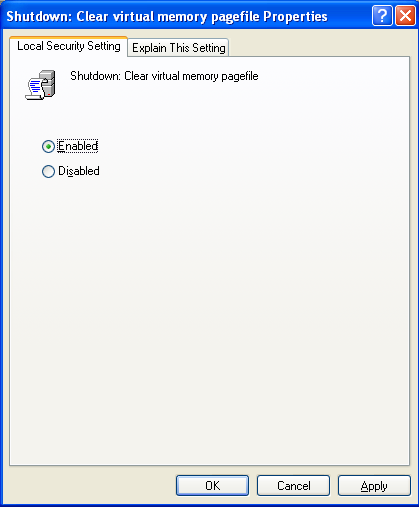
  5. Select Shutdown:Clear virtual memory pagefile and double click on it or right click on it and select Properties.
    local-security-settings-clear-page-files
  6. Check "Enabled" radio button.
    enable-shutdown-page-file-clean
  7. Click OK.
  8. Then restart the system to take the effect.
Windows Page file location
By default the operating system stores the page file in the system drive. If your system drive is C, the page file is located in the drive C.
windows7-page-file-location

It is recommend that you don't disable or delete the paging file. If a lack of RAM is slowing your computer, virtual memory moves data from RAM to a space called a paging file. Transferring data to and from the paging file frees up RAM so your computer can complete its work without issue.
* After editing the registry, you must restart the computer to take effect.
* After perform this task the system will clear the page file every time when you shuts down the system. This may slow the shutdown time one or two minutes.

Change virtual memory size in windows 7

How to change virtual memory settings in Windows-7

Sometimes you may receive warning message that your virtual memory is very low. Then you will need to increase the size of your paging file. Here is the way to perform that task.
Page file is use as a random access memory (RAM). In most operating systems use a reserved hard disk space for its page file or virtual memory. It stores data that has not been used recently. You can gain better performance by optimizing page file size. When all physical RAM is in use, the operating system starts using page files as additional RAM. You can't gain more performance by increasing the page file size meaninglessly. That means do not exceed the maximum page file size or don't allocate bellow the minimum page file size.

If your machine has plenty of RAM, it would be unnecessary to set large paging file sizes.

By default the page file is located in the drive which you have installed the operating system. Ex. C:\pagefile.sys You can't delete page file while the system running because on a running system, page file is opened exclusively by the operating system. You can delete page file by setting allocated size to 0MB or selecting the option No paging file. But windows do not recommend. You can set page files per each drive in your system. But it is good idea to let the machine to control the page files in your system.


Steps to change the page file size in windows-7

  1. Press Windows Logo key with Pause button or Press Windows logo key with R and open Run dialog box then type 'SystemPropertiesAdvanced' (without quotes) and press enter or Go to control panel and click on System, then click on Advanced System Settings. It will open System properties dialog box for you.
    Adjust page file settings in windows 7
  2. Click on Advanced Tab
  3. Under the performance section, click on Settings button. It will open performance Options dialog box for you.
    adjust-system-properties-virtaul-memory
  4. Under the Virtual memory Section click on Change button. It will open Virtual Memory settings dialog box for you.
    virtual-memory-performance-options
  5. Un tick Automatically manage paging file size for all drives check box.
    virtaul-memory-settings
  6. Then it will allow you to manually allocate the page file size for a selected drive.
    set-custom-page-file-size-in-windows-7
  7. Select a drive from "Paging file size for each drive" section.
  8. The default selection is System managed size. So you have to check the Custom size radio button.
  9. Type Initial page file size in MB and Maximum page file size in MB.
  10. Then click on Set button.
  11. Then click on OK button.

You can disable the page file for selected drive by checking the radio button 'No paging file. But it is not recommend. Usually the minimum page file size is installed RAM+300MB and the maximum size will be 3 times the amount of RAM installed on your machine.
* After changing the page file size, you must restart the computer to take effect.